The Aeropress is a revolutionary, handheld coffee brewing device designed for both home and travel use. Known for its ease of use and durability, it consistently delivers a smooth, full-flavored coffee without bitterness, making it a favorite among coffee enthusiasts worldwide since its introduction.

Brewing Methods
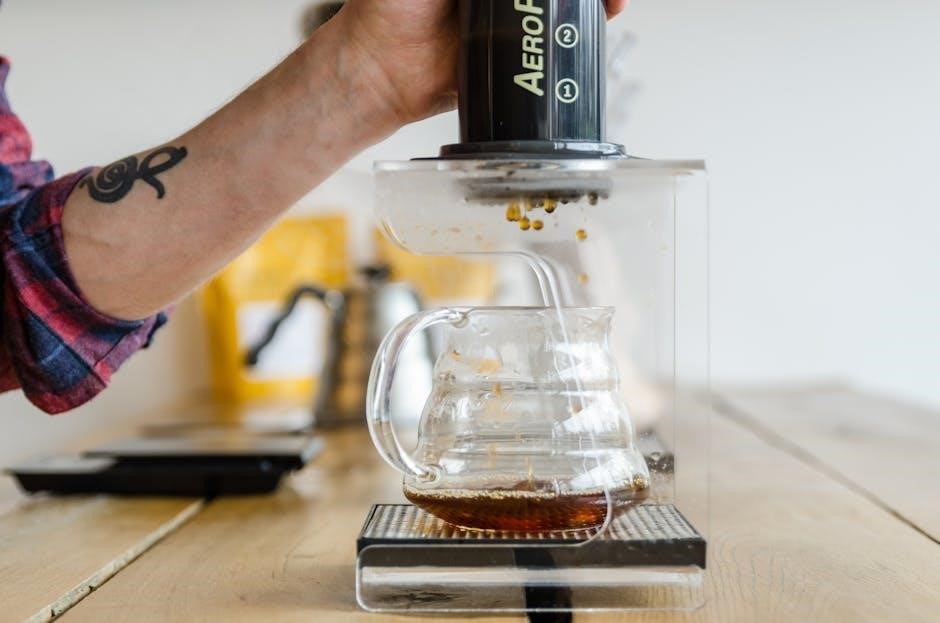
The Aeropress offers two primary brewing methods: the standard and inverted techniques. Both methods emphasize a smooth, full-bodied flavor and allow for customization. The standard method involves adding coffee grounds to the chamber, pouring hot water, and pressing slowly. The inverted method, while less recommended, enables a longer steep time for unique profiles. This versatility makes the Aeropress a favorite among coffee enthusiasts.
Each method ensures a clean, rich cup with minimal effort, catering to personal taste preferences. Proper technique and grind size are key to achieving optimal results. Explore these methods to find your perfect brew.
2.1 Standard Brewing Method
The standard brewing method with the Aeropress is straightforward and produces a smooth, full-bodied coffee. Start by rinsing the paper filter with hot water to ensure no paper taste remains. Place the filter in the cap and twist it onto the chamber. Add 17-21 grams of finely ground coffee to the chamber, depending on your desired strength. Pour hot water (around 200°F) over the grounds, making sure to saturate all the coffee evenly. Allow the mixture to bloom for 10-15 seconds before stirring gently. Use the provided scoop or a spoon to stir, ensuring all grounds are submerged. After 1-2 minutes of steeping, slowly press the plunger down with steady, gentle pressure. This step should take about 20-30 seconds to avoid bitterness. The result is a clean, flavorful coffee that can be enjoyed on its own or used as a base for espresso-style drinks. Always eject the used coffee grounds immediately after brewing to prevent residue buildup. This method is ideal for those seeking a classic, balanced cup with minimal effort and cleanup. Its simplicity and consistency make it a favorite among Aeropress users worldwide.
2.2 Inverted Brewing Method
The inverted brewing method is a popular alternative to the standard Aeropress technique, offering more control over the steeping process. To begin, place the plunger at the bottom of the chamber and add 17-21 grams of finely ground coffee. Pour hot water (around 200°F) over the grounds, filling the chamber to your desired level. Stir gently to ensure all grounds are saturated. Allow the coffee to steep for 1-2 minutes, depending on your preferred strength and flavor profile.
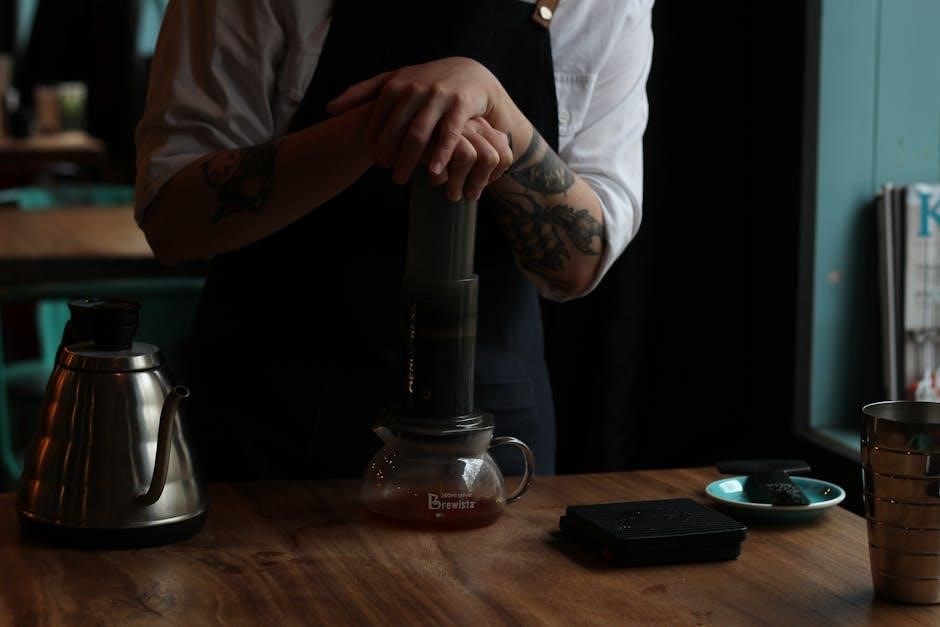
After steeping, carefully flip the Aeropress onto a sturdy mug and press slowly. This method allows for a cleaner extraction and can result in a more vibrant, full-bodied flavor. Some users prefer the inverted method for its ability to immerse the coffee grounds evenly and avoid channeling. However, it requires extra caution to prevent spills during the flipping process. For the best results, use a fine to medium grind and adjust the steeping time to suit your taste preferences. Always press gently to avoid pressing too hard, which can lead to bitterness or potential breakage of the device. The inverted method is a versatile option for those looking to experiment with their Aeropress and explore different flavor profiles.
Maintenance Tips

Regular maintenance ensures your Aeropress lasts longer. Always eject used coffee immediately after brewing and wash the device with warm water. Store the Aeropress with the plunger fully inserted to prevent damage. Cleaning and proper storage keep it in optimal condition for consistent brewing results.
3.1 Cleaning the Aeropress
Cleaning the Aeropress is essential for maintaining its performance and longevity. After each use, immediately eject the used coffee grounds into a trash can or compost bin. Rinse the chamber, plunger, and filter cap with warm water to remove any residual coffee oils and sediment. For more thorough cleaning, use a soft sponge or cloth with mild soap, but avoid harsh chemicals or abrasive scrubbers that could damage the materials.
Dry the Aeropress thoroughly after washing, paying extra attention to the rubber seal to prevent moisture buildup. Regular deep cleaning can be done by soaking the components in warm soapy water for about 10 minutes. This helps remove any stubborn stains or buildup. Always rinse thoroughly to ensure no soap residue remains.
Never put the Aeropress in a dishwasher, as high heat can warp the plastic or damage the rubber seal. For optimal hygiene, clean the Aeropress after every use and perform a deep clean every 1-2 weeks. Proper cleaning ensures your Aeropress continues to deliver smooth, flavorful coffee and remains in great condition for years to come.
3.2 Storage Guidelines
Proper storage of the Aeropress is crucial to maintain its longevity and performance. After cleaning, store the device with the plunger fully pushed into the chamber to protect the rubber seal and prevent dust accumulation. Ensure all parts are completely dry before storage to avoid moisture-related issues.
Keep the Aeropress in a cool, dry place, away from direct sunlight, which can cause the plastic to degrade over time. Avoid storing it in humid environments, as this may lead to mold or mildew growth. For added protection, use the provided storage bag or a soft cloth to cover the Aeropress when not in use.
When traveling, store the Aeropress in its carrying bag to prevent scratches or damage. Never store coffee grounds or residual liquid in the device, as this can attract pests or create unpleasant odors. Regularly inspect the rubber seal and replace it if signs of wear appear. By following these storage guidelines, you can ensure your Aeropress remains in excellent condition and continues to deliver exceptional brewing results for years to come.

Troubleshooting Common Issues
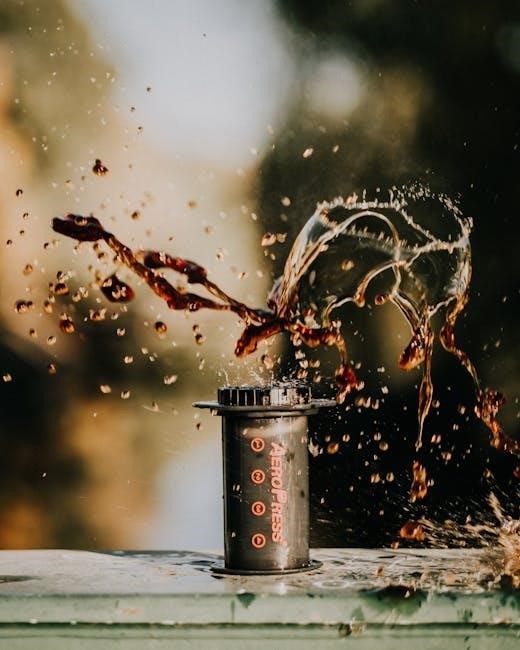
While the Aeropress is a durable and user-friendly brewing device, some common issues may arise during use. One of the most frequent problems is over-extraction, which can result in a bitter taste. This often occurs when the coffee grounds are too fine or the brewing time is too long. To fix this, try using a coarser grind or reducing the steeping time.
Another issue is weak or under-extracted coffee, which happens when the grind is too coarse or the water temperature is too low. Adjusting the grind to a medium consistency and ensuring the water is between 160°F and 170°F can resolve this problem. Additionally, some users experience water shooting up during pressing, which can be caused by pressing too hard or using a loose rubber seal. Always press gently and check the seal for proper alignment.
Leaks or spills during brewing can be frustrating. These are often due to improper assembly or a damaged seal. Inspect the rubber seal regularly and replace it if necessary. For best results, avoid pressing too forcefully, as this can lead to breakage or spills. By addressing these common issues, you can ensure a seamless and enjoyable brewing experience with your Aeropress.
Advanced Techniques and Recipes
For those looking to elevate their Aeropress game, advanced techniques and recipes can unlock even more flavor possibilities. One popular method is the inverted brewing technique, which allows for a longer steeping time and a cleaner extraction. Simply invert the Aeropress, add coffee grounds, pour hot water, and stir before flipping and pressing slowly. This method is ideal for those who prefer a smoother, less bitter cup.
Experimenting with coffee-to-water ratios is another way to tailor your brew. For a stronger cup, try increasing the coffee dose to 20-22 grams, while a lighter cup can be achieved with 14-16 grams. Adjusting the grind size slightly finer or coarser can also enhance the flavor profile. Additionally, blooming the coffee for 30 seconds before adding the remaining water can bring out more nuanced flavors.
For a unique twist, try the Aeropress Latte by pressing a double shot of espresso and mixing it with steamed milk. Another creative recipe is Aeropress Cold Brew: steep coarse-ground coffee in cold water for 12-24 hours, then press and enjoy over ice. These advanced techniques and recipes allow you to explore the full versatility of the Aeropress and craft a cup that suits your taste perfectly.
Leave a Reply
You must be logged in to post a comment.